1. Ingredients for Making Idli
For the Batter:
- Rice (preferably parboiled rice or idli rice) – 2 cups
- Urad dal (split black gram) – 1 cup
- Fenugreek seeds – 1 tsp (optional but helps in fermentation)
- Water – for soaking and grinding
- Salt – to taste
- Oil or ghee – for greasing the idli plates
For Serving:
- Sambar (a spiced lentil soup with vegetables)
- Coconut chutney (made with fresh coconut, green chilies, and seasoning)
2. The Preparation Process
Step 1: Soaking the Rice and Dal
The first step in making idli is to soak the rice and urad dal. This step ensures that the ingredients soften, which makes the grinding process smoother and easier. Soaking also helps in achieving the right texture for the batter.
- Rice: Use 2 cups of rice (preferably parboiled rice or idli rice). Parboiled rice is the preferred choice for making idli because it has a slightly different texture, which helps in creating the soft and fluffy idlis. If you can’t find idli rice, regular white rice will work as well.
- Urad Dal: Take 1 cup of urad dal (split black gram). This dal is essential as it helps in fermentation and provides the idli batter with a fluffy texture. The dal should be soaked in water for about 6-8 hours or overnight.
- Fenugreek Seeds: If you are using fenugreek seeds (which is optional), add 1 teaspoon to the urad dal while soaking. Fenugreek helps in fermentation and gives the idli a slightly tangy flavor.
After soaking the rice and dal for the required time, drain the water.
Step 2: Grinding the Rice and Dal
Grinding the rice and dal separately is a critical step. Traditional methods use a wet stone grinder, but you can use a high-powered blender or a wet grinder if you have one.
- Grinding the Urad Dal: Begin by grinding the urad dal along with fenugreek seeds (if using). Add a little water as needed to make a smooth, thick batter. The consistency should be light and airy. If using a wet grinder, you should aim to grind the dal until it becomes fluffy and soft. This aerates the batter, which is key for light and soft idlis.
- Grinding the Rice: Now, grind the soaked rice. Add water gradually and grind the rice to a slightly coarse consistency. The rice should not be ground too fine; a slight grainy texture is what you’re looking for. This coarse texture is important for giving the idlis their characteristic texture.
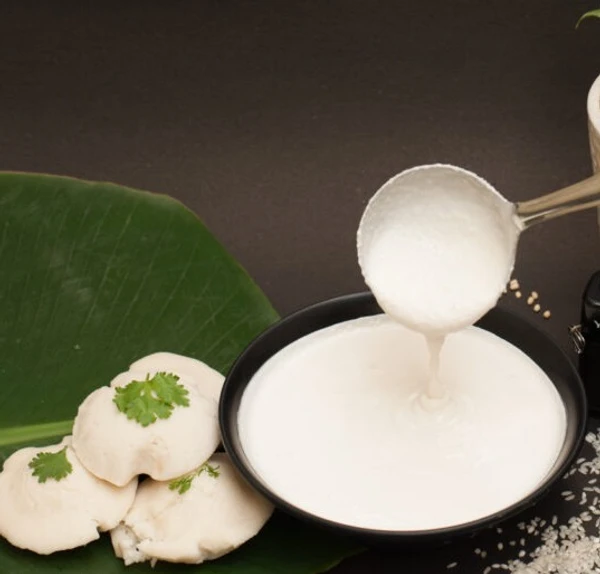
After grinding both components, combine the rice and dal batters together in a large mixing bowl. Add enough water to get the batter to a smooth, pourable consistency, but not too runny.
Step 3: Fermenting the Batter
Fermentation is a crucial part of the idli-making process. It’s what makes the idlis light, airy, and fluffy. In warm climates, fermentation can take place within 8-12 hours. In cooler climates, it might take up to 24 hours. The ideal temperature for fermentation is around 28-30°C (82-86°F).
- How to Ferment: After combining the rice and dal batters, cover the bowl with a clean kitchen cloth or lid, leaving some room for air to escape. Place the bowl in a warm place, such as near a stove or in an oven with the light on, for optimal fermentation.
You’ll know the batter is ready when it has increased in volume and has a slight sour aroma. The batter will also appear bubbly, which indicates that the natural yeasts have begun to work.
- Tip: In colder regions, you can ferment the batter in the oven (with just the light on) or use an electric yogurt maker to maintain the warmth necessary for fermentation.
Step 4: Steaming the Idlis
Once your batter has fermented and is ready, it’s time to steam the idlis.
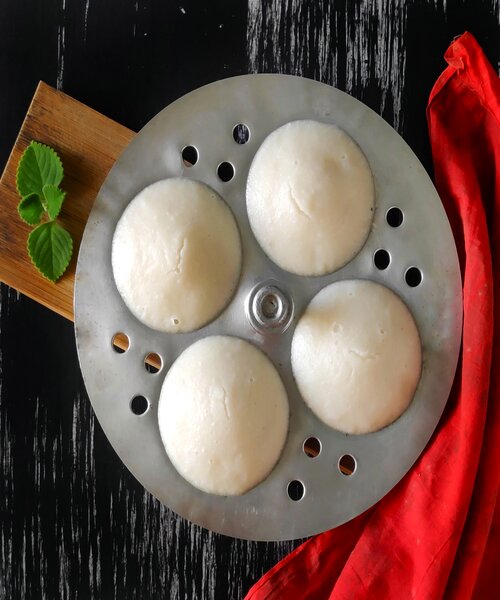
- Preparing the Idli Plates: Grease the idli plates with a little oil or ghee to prevent the idlis from sticking. This also adds flavor to the idlis.
- Steaming Setup: Fill a large steamer or a pressure cooker (without the pressure valve) with water and bring it to a boil. Place the idli plates inside the steamer or pressure cooker, ensuring that the water does not touch the idli batter. The batter should sit in individual cavities in the idli plate.
- Steaming: Carefully pour the fermented batter into each cavity of the idli plate, filling each about three-quarters full to allow space for the batter to rise as it steams. Stack the plates one over the other, if necessary, and cover the steamer or pressure cooker with a lid.
Steam the idlis for about 10-15 minutes on medium heat. You can check if they are done by inserting a toothpick or a fork into the center of the idlis. If it comes out clean, the idlis are ready.
- Tip: Avoid opening the lid frequently while steaming, as this can affect the steaming process.


Step 5: Serving the Idlis
Once the idlis are steamed, let them cool for a minute or two before removing them from the plates. Use a spoon or a butter knife to gently lift them from the idli plates. The idlis should be soft, fluffy, and perfectly cooked.
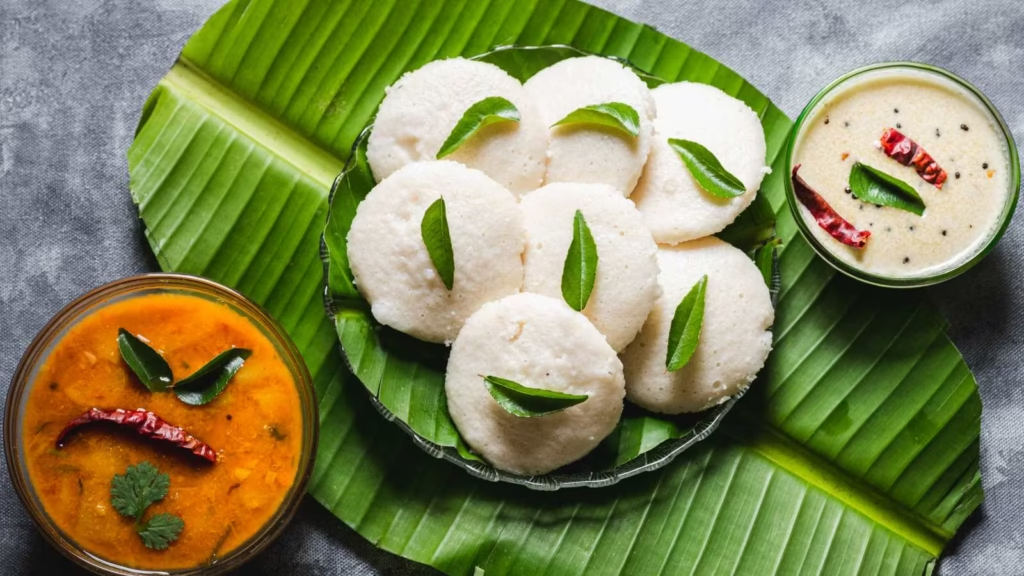
Serve the idlis hot with coconut chutney and sambar. You can also serve them with other accompaniments like tomato chutney or coriander chutney for added flavor.
3. Tips for Making Perfect Idlis
- Quality of Rice and Dal: Using the right quality of rice and dal makes all the difference. Idli rice, when available, should be your first choice. If not, regular rice works fine, but the texture might differ slightly. Always use good-quality urad dal, as old or stale dal can affect the fermentation process.
- Fermentation: This is the most important part of making idli. If the batter doesn’t ferment properly, the idlis will be dense and hard. Ensure your batter ferments well in a warm, draft-free environment. If it’s not fermenting, it could be due to the temperature being too cold or using poor-quality dal.
- Grinding: The texture of the batter is key. Urad dal should be ground until it is fluffy and aerated, while the rice should be ground just until coarse. Both should be mixed together to form a slightly thick batter that is not too runny or too stiff.
- Steaming: Do not overcrowd the idli plates. Leave a little space for the batter to rise. Make sure there is enough water in the steamer, but not too much that it touches the batter in the plates.
4. Variations of Idlis
While the traditional idli is made from just rice and urad dal, there are several variations that can be tried to add variety to your idli menu:
- Rava Idli: Instead of using rice and dal, semolina (rava) is used to make the batter. This is a quicker alternative as it does not require fermentation.
- Kanchipuram Idli: These are spiced idlis, made with the addition of ginger, black pepper, and curry leaves. The batter is seasoned with these ingredients, giving the idlis a distinct flavor.
- Sambar Idli: A popular variation where idlis are served with a generous serving of sambar poured over them, making them a more filling meal.
- Mini Idli: Smaller-sized idlis made using the same batter. These bite-sized treats are usually served with chutney or sambar.
5. Nutritional Benefits of Idli
Idlis are considered a healthy breakfast option for several reasons:
- Low in Calories: Idlis are steamed and not fried, making them a low-calorie snack or meal. They are a great choice for weight-conscious individuals.
- High in Protein: The combination of rice and urad dal provides a good amount of protein, making it a complete meal.
- Easily Digestible: Due to the fermentation process, idlis are easier to digest compared to other rice-based foods.
- Gluten-Free: Since idlis are made with rice and dal, they are naturally gluten-free and are suitable for people with gluten sensitivity.